This guide covers product and manufacturing defect detection as one topic: the dataset, the two ways to frame the problem, the build steps, the metrics, the mistakes and the scope for each level.
- Benchmark: MVTec AD has 15 categories and over 5,000 images, with defect-free training images and pixel-precise defect annotations.
- Train on good parts only. That matches a factory, where defects are rare and new kinds keep appearing.
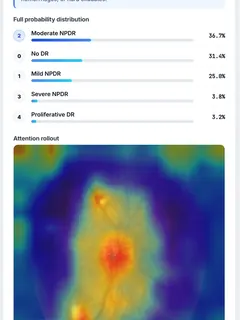
- Show where the defect is. A heatmap is what convinces an examiner and an inspector.
- Report two scores: one for telling good from defective images, one for locating the defect.
- Mind the licence: MVTec AD is for non-commercial use.
Which dataset should you use for defect detection?
MVTec AD is the benchmark most papers report on. It covers objects and textures, and every defect in the test images is outlined pixel by pixel.
| What | Detail |
|---|---|
| Categories | 15, a mix of objects and textures |
| Images | Over 5,000, in high resolution |
| Training images | Defect-free only |
| Test images | Good parts and several kinds of defect, with pixel-precise annotations |
| Licence | CC BY-NC-SA 4.0, so non-commercial use only |
Figures are from the MVTec AD page. A college project is non-commercial use; a product for a company is not.
Should you classify defects or detect anomalies?
There are two honest ways to set the problem up, and your data decides between them.
- Supervised: you have labelled photos of each defect type. Train a classifier for good against defective, or a detector such as YOLO that draws a box around each fault.
- Anomaly detection: you have mostly good parts. Train on those alone and flag whatever looks different. This is the MVTec AD setting, and methods such as PatchCore were designed for it.
How do you build a defect detection system step by step?
- Pick three to five categories, with at least one object and one texture, instead of all 15 at once.
- Set up a library. Anomalib is an open-source anomaly detection library that includes PatchCore and PaDiM.
- Train on the good images of one category. PatchCore builds its memory bank from a pre-trained network’s patch features, so there is no long training run.
- Score the test images and produce a heatmap for each.
- Set the threshold on held-out good images, never on the test defects.
- Compare two methods on the same categories, in one table.
- Build the inspection screen: upload or capture a photo, then show good or defective, the score and the heatmap.
Which metrics should a defect detection project report?
- Image-level AUROC: how well the score separates good parts from defective ones.
- Pixel-level AUROC or per-region overlap: how well the heatmap matches the outlined defect.
- Results per category, since an average hides the categories where the method struggles.
- Missed defects and false rejects at your threshold, because the two cost a factory different amounts.
- Time per image and memory used, if you claim it can run on a line.
What mistakes cost marks in a defect detection project?
- Training on test defects in the anomaly setting. The method must never see a defect before testing.
- Shrinking images too far. Small scratches vanish at low resolution.
- One threshold for every category. Set it per product.
- Showing only the best heatmaps. Include failures and say why they failed.
- Calling it factory-ready without measuring speed or testing under changed lighting.
How does the scope change for Diploma, B.Tech and M.Tech?
| Level | Scope | What to show |
|---|---|---|
| Diploma | Good against defective on one category with transfer learning | A webcam demo on a fixed stand with even lighting |
| B.Tech / B.E. | PatchCore against PaDiM on three to five categories | Heatmaps, a per-category table and an inspection app |
| M.Tech / M.E. | All 15 categories with a base paper’s numbers reproduced, plus one extension: few good images, a smaller memory bank with measured speed, or a different backbone | An ablation table and a paper in IEEE format |
Mechanical and production students often pair this with machine data: see our delivered M.E. / M.Tech case study on predictive maintenance using machine learning. For M.Tech, begin with choosing a base paper.
What goes in the report, and which viva questions come up?
Explain the inspection problem, why defects are rare, the method with a block diagram, the per-category results and the failure cases. For the document and slides, see our report and PPT help. Expect these:
- Why train on good images only?
- What is stored in the memory bank, and how is a test patch scored?
- What is the difference between image-level and pixel-level AUROC?
- How did you set the threshold without using defects?
- What happens when the lighting or the camera changes?
Related guides: unknown class detection, which asks the same question of a classifier, and waste classification using deep learning.
This guide is a plan to discuss with your guide, and the figures in it come from the linked dataset pages and papers, not from our own work. Our 8 delivered case studies are M.Tech and M.E. projects, each shown with its real paper pages, screens and results.
Frequently asked questions
Which dataset is used for defect detection using deep learning?
MVTec AD is the standard benchmark. It has 15 categories of objects and textures and over 5,000 high-resolution images. The training images are all free of defects, and the test images include several defect types with pixel-precise annotations. It is licensed for non-commercial use.
How can a model detect defects without defect images?
It learns what a good part looks like and flags anything that differs. PatchCore, for example, stores features of small patches from good images in a memory bank; at test time, a patch far from everything in the bank is scored as anomalous and lights up on the heatmap.
Should I use classification, YOLO or anomaly detection?
If you have many labelled photos of each defect, a classifier or a detector such as YOLO works well. If you have mostly good parts and few defects, which is the usual case in a factory, anomaly detection is the better fit and makes a stronger project.
What hardware do I need for a defect detection project?
For the benchmark, a laptop with a GPU or a free cloud notebook is enough. For a live demo, add a webcam, even lighting and a fixed stand so that every part is photographed the same way. Consistent images matter more than an expensive camera.
Can The Ultimate Project World help with a defect detection project?
Yes. Share your level, your branch and your review dates in the free consultation, and say whether you need a live camera demo. We will tell you exactly which parts we can take on, such as the code, the report, the PPT and viva preparation.